

Despite buying a premium tank or building it yourself, leaks can occur at times. It doesn’t matter whether the leak develops due to a mechanical fault or an integrity issue, you need to fix it as soon as possible. Smallest, negligible leaks often evolve into larger issues if not addressed on time.
As you’re here, you might’ve just found a leak, small or large, in your aquarium and are hoping for a quick solution before repairing the leak professionally or replacing the tank. In this article, we’ll go through the step-by-step process of finding the issue, assessing the damage, taking temporary solutions, and fixing the leak.
Table of Contents
Identifying the Leak
Reducing water levels in aquariums is natural through evaporation and biological usage, but rapid lowering of the same may occur due to leakage. Aquarium leaks are often subtle enough to not be detected unless the leak has grown to a problematic size.
Here are a few signs that you should be aware of:
Signs of a Leaking Aquarium
An aquarium with a massive crack or leak wouldn’t require identification. But, if you’re still wondering why your tank is losing water abnormally, consider going through these steps to find the culprit:
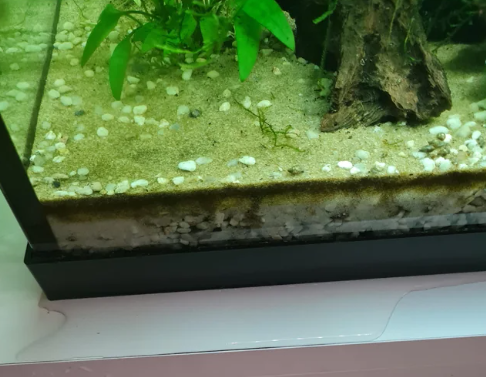
- Roam your hands around the tank and feel for any unusual wetness around the seams and the stand. If a wet or leaking spot is found, wipe it dry and see if it re-dampens. Move around to ensure there aren’t multiple leaks.
- If you can’t track the water back up to the tank seams, the leaks may also be at the bottom and from an invisible crack.
- If there’s a visible crack on the glass, wipe it dry and see if a leakage has occurred.
- In case the tank isn’t leaking, inspect the equipment, such as the filters, for overflow. They may clog up if not cleaned up in a while. Typically, HOB filters are more prone to overflowing than canister filters.
As a precautionary measure, put towels on the floor where the water is flowing to avoid any physical damage occurring to you while moving around.
Tools Needed for Inspection
A few tools that you may need to inspect for a leakage include:
- A flashlight
A flashlight will illuminate the darker corners and allow you to inspect the areas behind the equipment. It’ll also allow you to identify a leak hidden beneath the substrate.
- Paper towels
You may use a paper towel to wipe along the seams, joints, and around the base to look for moisture or water trails. Paper towels are much more effective in this regard than using your hands.
- Buckets
If it’s visibly leaking a lot, you want to store the treated aquarium water in buckets to move your fish and plants temporarily to them. You also need to move the decorations and keep running the filters to save the beneficial bacteria.
- A mirror
A mirror could help you get a closer look at suspicious areas like behind decorations and under the gravel.
Once a leak has been found, you need to enforce a rapid turn of events that first safeguard the livestock and, secondly, repair the leak.
Temporary Solutions
Your livestock are the priority whenever a leak occurs. If the breach is allowing you enough time to prepare, here are a few things that you need to perform.
Assessing the Damage
Not all leaks are the same. A crack in the glass is much more critical than a pinhole leak on the seam. Once you’ve found the source of it, you need to assess the damage to strategize a countermeasure.
If the leak is due to filter overflow or a loose screw, the easy fix is to clean or replace the unit, whatever is more appropriate. For now, you may either try to resolve the issue or disconnect the unit from the circulation. However, keep the filter media in tank water to ensure the survival of the beneficial bacteria. This is among the reasons why aquarists have multiple filters in their tanks.
In more serious cases, assess the extent of the damage and roughly calculate how much time you may have. If you’re observing a rapid decline in water levels, you need to act fast and follow the next steps.
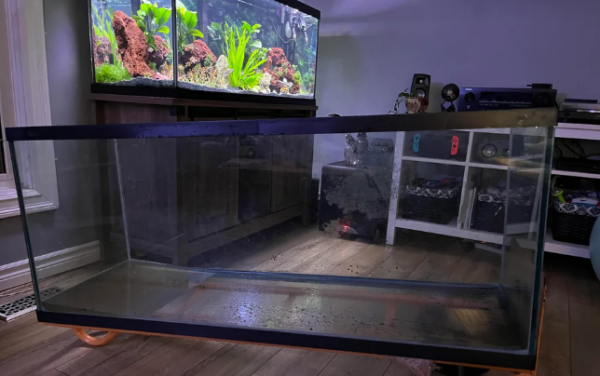
Emptying the Aquarium Safely
As mentioned, your fish and plants are of utmost priority. Collect the aquarium water in buckets or tubs suitable for your fish and plants. Better if you have a spare tank for emergencies. Drop everything, including the substrate and filter media, in the buckets or the tank.
It’s recommended to keep the water flow running and the filter media active despite reorientation. Be careful when using filters in smaller tanks, as they may overpower and suck in smaller fish and leaves.
Once the leaked tank is dry enough, inspect it for structural integrity. As we’ll be resealing the tank, find out any other potential leakage spots and weaker bonds. Afterwards, follow the procedures mentioned below to repair the tank.
Evaluating Equipment for Damage
Some equipment, such as lighting systems and heaters, may get damaged due to the leaked water. Consider inspecting them carefully and evaluating if they’re operational and are safe to be reintroduced to the tank.
If you’re not confident about their operability anymore or are frightened to zap your livestock, replace them while repairing the tank.
Repairing the Leak
Repairing your leaked tank requires a few materials and knowledge. Here is how to do it:
Materials Required for Repair
Depending on the extent of the damage and location of the leak, required materials may include:
- Silicone Sealant
This is the absolute must-have for fixing most leaks. Make sure it’s specifically labeled for aquarium use and safe for fish. Look for “100% silicone” and “fungicide-free” on the label.
- Razor Blade
A single-edge razor blade is ideal for removing old silicone and cleaning the area before applying new sealant.
- Acetone or Alcohol
This will help clean and degrease the surfaces before applying new silicone. Use after removing the residual old silicone.
- Paper Towels
You’ll need plenty of these for cleaning, wiping, and applying pressure during the repair process.
- Caulking Gun
This makes applying the silicone sealant much easier and more precise. Ensure that you’ve got the appropriate-sized silicone sealant to use with the caulking gun.
- A PVC card (credit/debit card)
A PVC card will help you smoothen the seams out after application. However, you may also use the razor blade for the same.
- Epoxy
If the leak is on a crack or chip in the glass, you might need epoxy to fill it in before applying silicone. Make sure it’s aquarium-safe.
- Super Glue
For very small cracks or hairline fractures, a tiny dab of cyanoacrylate glue can be a temporary fix until you can do a proper repair. Again, ensure it’s aquarium-safe.
- Painter’s Tape
This can help mask off areas you don’t want to get silicone on when applying it.
Additionally, gloves, masks, and UV lights may help you stay safe and accelerate the process.
Patching Small Cracks
Hairline cracks can be fixed with epoxy and super glue. Consider using silicone over it for a more permanent solution.
- Prepare the Surface: Use sandpaper to gently roughen the area around the crack. This will help the epoxy adhere better to the surface.
- Clean the Area: Wipe the area with a clean, damp cloth to remove any dust or debris.
- Mix Epoxy: Follow the instructions on the epoxy packaging to mix the epoxy resin and hardener thoroughly. Be sure to wear gloves during this process.
- Apply Epoxy: Use a small brush or spatula to apply the mixed epoxy over the crack. Ensure that the epoxy covers the entire crack and extends slightly beyond it to create a strong bond.
- Allow to Cure: Follow the curing time mentioned in the epoxy instructions. Keep the aquarium in a well-ventilated area during this time.
- Test for Leaks: After the epoxy has fully cured, fill the aquarium with water and monitor for any leaks. If there are no leaks, you can proceed with refilling the aquarium.
- Apply Silicone: Get a small-sized aquarium-safe silicone bottle to apply on the crack and let it dry for a day or two.
Replacing Damaged Seals
Repairing more severe damages to the seals requires more patience and skills. While we recommend asking a professional to help, you can do it by yourself with practice.
- Remove Old Sealant: Carefully scrape off the old silicone sealant using a razor blade or scraper. Be thorough but gentle to avoid damaging the aquarium glass.
- Clean the Area: Wipe the area with isopropyl alcohol and a clean cloth to remove any residue and ensure a clean surface for the new sealant.
- Apply New Sealant: Using a caulking gun, apply a bead of aquarium-safe silicone sealant along the seam where the old sealant was removed. Ensure that the sealant covers the entire seam evenly.
- Smooth the Sealant: Use a wet finger or use the PVC card to smooth the silicone sealant to create a neat, smooth finish along the seam.
- Allow to Cure: Follow the curing time mentioned on the silicone sealant packaging before verifying proper sealing with water.
Wait for the repair job to cure and prepare to reassemble the aquarium.
Also Read: Why Do I Need A UV Sterilizer?
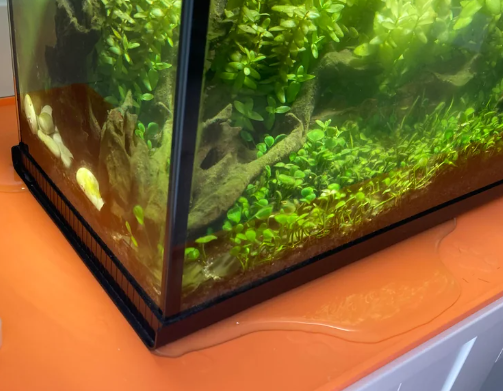
Reassembling the Aquarium
After you’ve repaired the leak, it’s time for the aquarium to reclaim its former glory. Here is how:
Cleaning and Preparing the Tank
Clean the tank thoroughly and eliminate any residual smell or silicone. You may use bleach or something similar, but use a lot of water to wash them afterward. If you didn’t remove the substrate, avoid using any acidic compound to clean the tank.
Reinstall the substrate, decorations, and plants before refilling with water. You may partially use the collected water. But, perform a major water change after resetting the tank to eliminate the ammonia and nitrate accumulation in the collected water with fish.
If you’re done with aquascaping, let’s reinstall the equipment and the fish to the tank.
Reinstalling Equipment
Replace the damaged equipment and reinstall it. Clean the filters, do a thorough maintenance, and install lights. Ensure all the connections to the air pumps, decorations, and other equipment are functioning properly.
Reintroducing Fish
Let the water temperature hit the optimum range and introduce your fish to the tank in plastic bags. Let them accumulate to the temperature and release them after an hour. Monitor the water parameters meticulously for the next few days to avoid any sudden spikes.
Your fish may be stressed during this time. Feed them a smaller diet and reduce daylight time or dim the lighting for a few days to help their condition.
Tips for Long-Term Integrity
Maintaining the integrity of an aquarium to prevent leakage over the long term requires careful planning, proper maintenance, and proactive measures. Here are some tips to help ensure your aquarium remains leak-free:
Quality Tank Selection
Invest in a high-quality aquarium tank from a reputable manufacturer. Cheaper tanks may be more prone to leaks due to lower-quality materials or craftsmanship. If you’re experienced enough, you may also DIY your way to a premium aquarium.
Regular Inspections
Perform routine inspections of your aquarium for any signs of wear, damage, or potential leaks. Check the seams, edges, and corners for any signs of stress, cracks, or weakening. Avoid metallic algae scrapers if possible. They often scrape away the corners.
Proper Placement
Ensure that your aquarium is placed on a stable, level surface that can support its weight. Avoid placing it near sources of excessive heat, direct sunlight, or high-footfall areas where it could be accidentally bumped or knocked over. A tilted surface will put more pressure on a single wall—causing the seam to stretch and tear.
Use of Stand
Consider using a sturdy aquarium stand designed to support the weight of your tank evenly. A stand specifically designed for aquariums will provide better support than makeshift solutions. A strong stand will reduce vibrations and absorb impacts better. Place a protective mat or foam padding beneath your aquarium to provide additional support and cushioning against uneven surfaces.
Avoid Overfilling
Never overfill your aquarium beyond its recommended capacity. Overfilling can put excess stress on the tank seams and increase the risk of leakage.
Proper Water Condition
Maintain proper water parameters, including temperature, pH levels, and water hardness, to prevent corrosion and deterioration of the tank materials.
Silicone Maintenance
Check the silicone seals regularly for any signs of wear or deterioration. If you notice any issues, consider resealing the tank with aquarium-grade silicone sealant.
Emergency Preparedness
Have a plan in place in case of a leak, including having a backup tank or container to temporarily house your fish while you address the issue.
FAQs
Depending on the type of leak, aquarium silicone can be used to seal a leaking tank. Hairline cracks, however, can be repaired with epoxy and super glue. Allow the silicone enough time to cure before refilling your time and reintroducing the fish.
If your tank is leaking, remove the livestock from your tank and place them in buckets filled with aquarium water. Remove the filters, plants, and the decorations. Remove the substrate if the leak is near the bottom. Afterward, seal the tank with aquarium silicone, allow for it to cure, and reintroduce everything.
An excessive strain of the seams, sudden impact, and mechanical damage can cause a fish tank to start leaking. Follow the tips to avoid such unfortunate events.
In most cases, fish tanks can be repaired. However, it’s better to replace the tank if a major accident, like, say, the cracking of a glass wall, has occurred.
The Bottom Line
We’ve prepared a guide for you to secure, prepare, and fix your leaking tank through this article. Hopefully, you’ll be able to find what you require in this time of crisis. We wish you good luck.