Table of Contents
Shrimp Tank Set Up Guide
Shrimp are not just delicious delicacies, but they make great pets as well (who knew)! If you want to graduate from fish keeper to shrimp keeper, then this is the guide for you. Many people assume shrimp are difficult to keep, but that simply isn’t true!
Introduction to Aquarium Shrimp
Shrimps can vary in species from dwarf shrimp to ghost shrimp and so on. Keeping a shrimp aquarium can be fun but to keep your little crustaceans healthy, certain parameters need to be met.
These tank inhabitants can live alone as well as with groups of fish, who makes the excellent tank mates. They may also pick up the scraps of leftover food your fish have no desire to eat. They can be great tank mates but for most freshwater aquarium shrimp and fish, you need to make sure they get along.
Continue reading to learn everything you need to know about shrimp tank setup.
Step 1: Choosing Your Tank
Let’s start by setting up the habitat first.
What size tank do shrimp need?
Usually, shrimps do not require large tanks, but the number of in habitants should be reflected in the size of the tank. A 10 gallon tank is the most common, however, a 5 gallon shrimp tank would suffice with a smaller amount.
If we had to ballpark, we’d say a 10-20 gallon freshwater shrimp tank would be the best and most forgiving of the occasional error in tank consistency. As a beginner, you also allow yourself more freedom to make these errors (though you should avoid it). Sure, a smaller tank is more manageable, but the precision it requires outweigh the benefits.
One of the most important factors in a tank for shrimps is an aquarium cover, as they tend to escape their sometimes. As hard to believe as that is, it’s better to be safe than sorry!
Our Recommended Tank: Marina 10 Gallon LED Aquarium Kit
Tank Placement
An ideal spot for a shrimp tank would be someplace that can handle the weight. Wash the substrate and the plants and anything else that goes into the tank. Fill up the water and use water conditioner to neutralize the chlorine content. Cycle the water through the equipment and tank until the test water kit gives you the green light to add the inhabitants.
We think you’ll like: Best LED Aquarium Lighting
Step 2: Adding Decorations and Plants
Many shrimp tanks can seem quite bare when you look at a shrimp tank setup. This is so the breeders can easily see these little critters scuttling about. However, you want these little creatures to feel at home, so adding some plants here and there and a few decorations is recommended.
Even though they are adorable, the shrimp are delicate animals that are unfortunately on the bottom of the food chain. While it’s painfully obvious to us, your little freshwater shrimp may not know they are no longer in the big lake anymore.
A planted shrimp tank in this case will come in handy as it will simulate their natural environment. You will see these delicate little animals scurrying and hiding among the plants, and this is especially apparent during molting (when they shed their exoskeleton).
This leaves them vulnerable and in need of places to duck and hide. Other than providing a hiding place for your shrimp, these aquarium plants also help stabilize water quality, which could be very useful for novice breeders.
Finding the right beginner aquarium plants and wood such as cholla wood will built them a fine little nesting place.
Some Suggestions
Java Moss
No products found.
No products found.
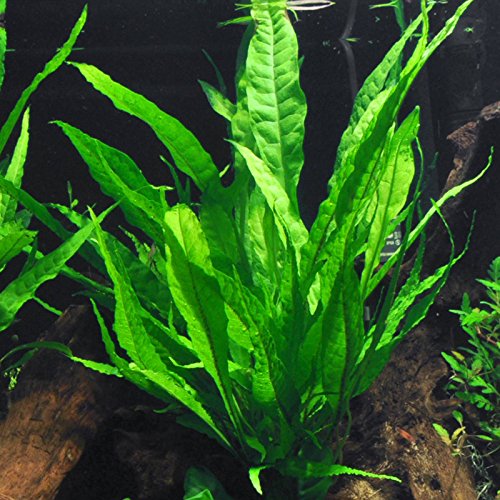
Java Fern
Cholla Wood
Step 3: Adjusting Tank Water Temperature
The temperature of the water in the aquarium can vary depending on the species of shrimp.
There are cold water species as well as species that prefer warmer water. The temperature of the water can have an effect on their breeding habits too, so you have to know the correct one that your species require.
For instance, cold water shrimp require temperature somewhere between 54-59 F (12-15 C).
For such warm water species like Tiger, bee or bumblebee shrimp the preferable water temperature is a little warmer, around 66-77 F, which is equal to 19-25 C.
If you have Amano shrimp, then the water temperature should be set somewhere between 50-86 F (10-30 C). As for tropical cleaner shrimp species, the required temperature is 75-79 F (23-26 C).
The temperature of your small shrimp tank will depend largely if not solely on the species of your shrimp. We would suggest doing your research to determine the right number.
Elements such as the time of day and the season of the year could affect your tank water, so you may need to purchase a heater to keep the inhabitants healthy. Did you know that even opening and closing the door to a room can affect your shrimp tank temperature?
For something so hard to manage, a thermostat heater will succeed where you fail. They work by maintaining a set temperature, much like the thermostat in your house. Once the temperature dips below a certain degree, it turns on.
One tip we do have on thermostats is to get one of a good quality. It greatly decreases the chances of malfunctions, which could result in temperature dips that affect your shrimp. Adding a thermometer in a visible area also allows you to keep your finger on the pulse of things.
Our Recommended Heater: Hygger Submersible Aquarium Heater
No products found.
No products found.
Step 4: Adding Substrate into Shrimp Tank
Having a tank full of good substrate is essential for shrimps as they like to dig the substrate and bury themselves, and scavenge for food. The substrate refers to whatever you choose to line the bottom of your tank bed.
When choosing a substrate, which can be found in any fish store, choose the one with no chemicals as shrimp are known to be sensitive to chemicals. It is also recommended to rinse and wash the substrate before adding it to the tank.
The substrate should cover the entire bottom of the tank. You can leave the front part of the tank flat and open as they like to look for food and partners in an open area. Also, feeding them in the front of the tank will make them more visible to you.
Substrate is a big discussion topic for shrimp keepers. Lets take a look at the top recommended options:
Sand: Large-grained sand is optimal because they don’t trap food beneath them and is relatively easier to clean compared with their larger and rougher counterparts.
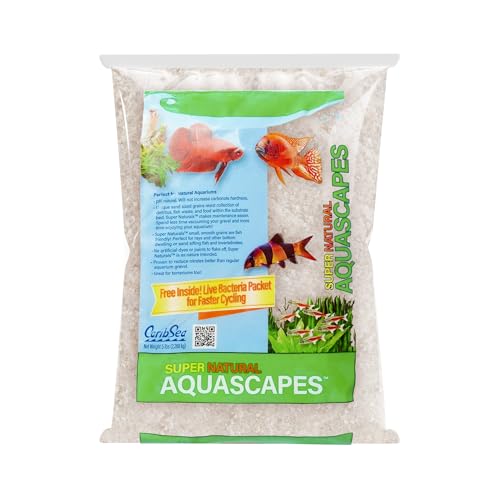
Our Recommended Sand Substrate: CaribSea Super Naturals Crystal River Sand
Gravel: Some shrimp tank set ups have gravel, which in turn allows the plants to take root more easily.
Our Recommended Gravel Substrate: Seachem Flourite Black Clay Gravel
Buffering substrates: These tank bed liners have the ability to keep the pH level making the water “soft”. This is preferable to the shrimp and also for the plants and maybe fish as well.
Whether or not you should go for the buffering substrates can depend on your expertise. If you are a novice just getting a foothold on keeping a tank of freshwater shrimp, then no. Whether you decide to go for sand or gravel, that’s also entirely up to you. After trial and error, you will eventually sort out which you prefer.
The color is also of your own preference, but black will highlight the shrimp, food and everything else by providing a higher contrast.
Step 5: Setting up the Tank Light
Tank light requirements vary depending on the type of the tank. Tanks with plants require whole different light setups than those without any.
The best light for tanks is considered to be LED light as these are more comfortable and affordable nowadays (not to mention economical). You can get ahold of these light in any pet store with a fish section or even online. The light needs to be on at least 8 hours per day (in tanks without plants) to avoid too much algae growth.
For tanks with plants you might need more advanced lights. The light choice can depend on the amount of CO2 and fertilizers in the tank. For these types of lights do more research for correct choice.
Our Recommended Aquarium Light: Aqueon Moduelar LED Aquarium Light
Step 6: Filling the Tank and Setting the Filtration
Use a pipe or a bucket, they are the easiest to help fill you tank. Check the pH level of the water and if it is too high or low add driftwood or some peat to the filter to soften the water. You need to use a de chlorinator every time you change the water as shrimp are sensitive to the chlorine found in the tap water.
Does a shrimp take need a filter?
A shrimp tank needs a filter just like we need oxygen and trees. Having a good filtration system in the tank is vital for shrimp, as it not only cleans and purifies the water, but it also creates an atmosphere of their natural habitat by providing water flow.
Choose a good filter that will provide both biological and chemical filtration. For instance, you can choose a sponge filter. These are easy to take care of and are less costly than other filters.
Also, sponge filters do not provide strong water flow, which is much safer for these tiny crustaceans and even safer for their offspring, as the baby shrimp often gets sucked into the filter.
Let’s dive a little deeper into the separate filters to help determine which is best for you.
Sponge filter – This is preferred by most shrimp breeders. As said before, shrimp are small organisms that are at mercy of the ebb and flow of the tides. In the tank, that happens to be the filter. Sponge filters are gentle and safe for your shrimp. However, they aren’t suitable for tanks with a larger capacity than 20 gallons.
Our Recommended Sponge Filter: Hygger Aquarium Double Sponge Filter
Internal filter – This is a common option. So common in fact, that chances are you’ve seen one in every fish tank you’ve laid eyes on. They work well, and may be a good choice your shrimp tank setup if you have other tenants as well. However, make sure you find one that is shrimp-friendly, as they can double as shrimp killers!
Our Recommended Shrimp-Safe Internal Filter: Aqueon QuietFlow Internal Shrimp Filter
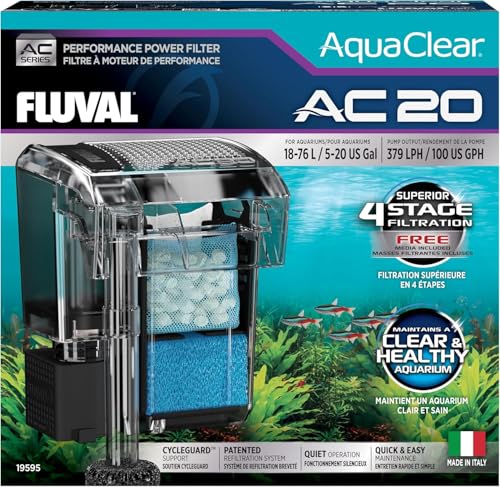
HOB filter – These filters hang on the back of your tank, hence the name. They help aesthetically for those who don’t want an ugly black thing taking focus off the beautiful fish. Definitely get a filter guard for this option as they could suck your shrimp up for dinner.
Our Recommended HOB Hanging Filter: AquaClear Power Filter
Canister filter – The optimal choice for water quality, canister filters have room for lots of filter sheets. Opposite to the sponge filter, this option is ideal for fresh shrimp tanks that are over 20 gallons.
Our Recommended Cannister Filter: Sunsun Tech’n’Toy External Cannister Filter
Step 7: Adding Your Shrimp to the Tank
Now onto bringing the shrimp in!
Before letting the shrimp get acquainted with their new environment, the tank should be cycled which can take several weeks with constant water tests. The light and the heaters need to be added to the tank as well. After cycling the tank for a few weeks, you need to check the water levels to ensure that everything is ready for the new tenants.
For elementary shrimp keepers, your shrimp keeping test kit should be able to test a few things:
- Nitrate, pH, gH, kH, Ammonia, and Nitrite. Take heed that nitrate and nitrite are two different things!
The levels of Nitrite and Ammonia in the water should be 0 ppm. When the level of Nitrite rises, you can decrease it by adding plants to the tank or by changing the water. The level of the nitrite should always be kept 0 ppm.
Our Recommended Testing Kit: API Master Test Kit
The purchased shrimp should be kept in a bucket and you need to use a tube to slowly add some cycled tank water to the bucket. Suck from the end of the tube to get water flow from the tank and slowly add it to the bucket. Check the shrimp to see how they react to the water.
This can take somewhere from half an hour to an hour and half. Then, use a net scoop to carefully take the shrimp out of the bucket and put them in the tank, make sure to cover the scoop as they may be looking to escape.
It is very important to monitor the shrimp after placing them in the tank for the first time. Make sure to keep the lights turned off and feed them only after 12 hours.
If you have an already populated tank, this could take some extra effort as you need to make sure their tank mates will accept them. Smaller shrimp may mean they are more at risk of getting eaten or bullied.
To keep your take 100% shrimp safe and not put them in harms way is to have a tank only inhabited by invertebrates (animals without a spinal column), such as snails. Not only do they make fantastic tank mates due to their timid nature, they also keep the shrimp aquarium clean!
If you go for the dwarf shrimp, there are a few species of fish that won’t look at them like their next meal. Certain catfish such as Cory and Otocinclus, and Tetra fish are shrimp-safe fish.
We wouldn’t suggest a lone fish in your tank. Schooling fish such as the Glass Catfish and small algae eating fish are also safer choices.
Step 8: Feeding Your Shrimp
You have everything worked out, from the water quality to the temperature and the substrate, but what about keeping your little critters fed? Food differs from species to species, but as a rule of thumb, the best food will mimic their natural diet.
Wild shrimp are foraging animals, which means they spend their day looking for food on the sea bed. The sort of food they come across include algae and leftover decaying parts of plants and animals that may float their way as well as biofilm.
Shrimp are omnivores that do enjoy a snack or two here and there. Toss them a few meat-based snacks for a treat.
Regular diet: Just like other pets, choose only high quality food without the fillers and preservatives. Something that will be consumed on the daily will need to have plenty of nutrients. Do your research and thoroughly examine the ingredients list before you purchase anything.
Snacks: Omnivorous animals eat both meat and vegetables. While your shrimp will appreciate a regular plant-based diet, having some good ol’ hearty meat fed to them on occasion will definitely win you some bonus points. Bloodworms, blanched vegetables such as carrots, peas, etc, and shrimp pellets are greatly appreciated.
EXTRA TIPS
Much like keeping fish, remove leftovers within a few hours and only feed as much as they are willing to eat within 5 min. This will keep your water quality and their environment clean. However, leaves and cholla wood (like we mentioned above) are permanent foods that can be left in the tank indefinitely. Shrimps generally only need to be fed once a day, but this is something you need to figure out with daily observation.
Shrimp Tank Maintenance
After you have set up your freshwater shrimp aquarium, your next step would be to look into maintenance.
How do you keep your tank in tip top shape?
Keeping shrimp shouldn’t be too difficult, all you need to do is to make sure you feed them right with the right food, set up the tank just so, make sure the water quality is perfect and pristine, only add tank mates who won’t view them as prey, find filters that won’t become shrimp traps, add decorations that they prefer and simulate their natural habitat, test the water regularly with a shrimp tank kit to make sure everything is looking good, and the lost goes on.
Well, I guess we spoke too soon. It’s not as easy as it seems and it does require attention and effort, almost like an art.
Water quality should be something you monitor on the daily. Shrimp are sensitive to fluctuations in the water and it could devastate their daily lives. Ammonia and nitrite are two of the chemicals which are considered deadly to your little crustaceans.
A way to help make water quality maintenance easy is to cycle your tanks before adding more tenants as mentioned, remove uneaten food or get a “cleaner” to do that, and a larger tank will be more forgiving with tiny fluctuations.
While water quality is a daily effort to keep (especially temperature), there are other tasks that you should undertake weekly. This includes changing water, and basic cleaning and caring for the plants and other inhabitants.
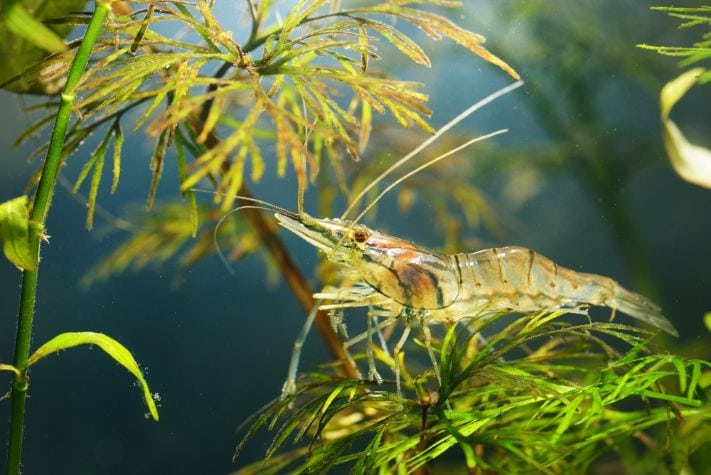
It takes time to understand just how much water needs to be changed, since everyone’s tanks vary from livestock to plant life, but planted shrimp tanks need less changed than ones without. As the weeks go on you will also become more familiar with the environment of your shrimp tank.
We would definitely add the water slowly to not alarm your shrimp, and use dechlorinated water.
The tasks we mentioned above shouldn’t be done monthly, the maintenance of the shrimp tank require more frequency than that.
However, as far as the filter is concerned, that can be done monthly. It’s a good idea to pair the water change with the filter cleaning and just do one big clean. Replace the filter when you find it not living up to its original standard.
Conclusion
Hopefully, this article was useful for setting up your shrimp tank. Just follow the instructions mentioned above and if you are still not sure if you are ready to set it up, do more research. Pay extra attention to the don’ts and remember to check up on your shrimp often.
Get the tank ready and the environment just right before adding any living creatures. If you are adding shrimp to your already populated tank, make sure the fish are shrimp friendly.
Good luck with your journey of keeping a tank full of shrimp.
No related posts.


